
I want to flip my high school classroom. What does that mean? How do you do it? How will this affect my students? Come find out!
Sunday, March 31, 2013
Colby's World - Goes LIVE (sort of)
Here is my web site that I am planning on hosting all of my content on:
I have decided to PAY for my OWN web hosting space. The benefits compared to other options is just too great.
Here are options I decided AGAINST:
(1) Getting a FREE "teacher page" - very limited, and often has adds and such
(2) District Web Page - limited as well (very simple interface that does calendars and posts homework assignments, teacher blogs... but does NO video posting, and NO Flash files. Also would be cumbersome and slow to use IF I am planning on doing a LOT of online content.)
(3) Adobe Creative Cloud's built in "Business Catalyst" server - The Hosting Service that comes with creative cloud is an introductory service with limits (only 100 mb of TOTAL file space on the server) To get anything real useful you have to pay for the $12 and above services (which seams REALLY expensive to me.) NOTE: I am referring to the HOSTING service only as being expensive. I STILL recommend the actual Creative Cloud subscription to use Adobe's software.
Here is what I HAVE decided to go with:
A web hosting service called "FatCow.com"
I am sure the deals change often, so the details might be different if you decide to subscribe. There was some sort of "Easter Sale" this weekend. I signed up for THREE YEARS at a price of $3.15 per month. Plus I paid for one year of privacy on my domain name ($9.95) although I don't know if I will keep that up after the year is out. It came with one year free domain name, unlimited upload space and unlimited bandwidth. Total cost = $123.40 for three years.
So far the FTP service on fatcow.com works well with the Adobe Muse application. (I just make changes on Muse and then click on "upload to FTP" and, a minute later, the files are all up-to-date.)
Cost: $123.40
Time: 2 hours
www.colbysworld.net
I have decided to PAY for my OWN web hosting space. The benefits compared to other options is just too great.
Here are options I decided AGAINST:
(1) Getting a FREE "teacher page" - very limited, and often has adds and such
(2) District Web Page - limited as well (very simple interface that does calendars and posts homework assignments, teacher blogs... but does NO video posting, and NO Flash files. Also would be cumbersome and slow to use IF I am planning on doing a LOT of online content.)
(3) Adobe Creative Cloud's built in "Business Catalyst" server - The Hosting Service that comes with creative cloud is an introductory service with limits (only 100 mb of TOTAL file space on the server) To get anything real useful you have to pay for the $12 and above services (which seams REALLY expensive to me.) NOTE: I am referring to the HOSTING service only as being expensive. I STILL recommend the actual Creative Cloud subscription to use Adobe's software.
Here is what I HAVE decided to go with:
A web hosting service called "FatCow.com"
 |
| LEFT: Control Panel, RIGHT: my new web page www.colbysworld.net |
I am sure the deals change often, so the details might be different if you decide to subscribe. There was some sort of "Easter Sale" this weekend. I signed up for THREE YEARS at a price of $3.15 per month. Plus I paid for one year of privacy on my domain name ($9.95) although I don't know if I will keep that up after the year is out. It came with one year free domain name, unlimited upload space and unlimited bandwidth. Total cost = $123.40 for three years.
So far the FTP service on fatcow.com works well with the Adobe Muse application. (I just make changes on Muse and then click on "upload to FTP" and, a minute later, the files are all up-to-date.)
Cost: $123.40
Time: 2 hours
Main Theme - found my "hook"
I stumbled upon the main "theme" for my web-page, interactive tutorials, and parts of my videos:
CHALKBOARD
Here is the main backdrop file that I put together today:
* Update: I removed the old blackboard file and put in my own file. You can see my "Colbysworld" water print in the lower-right corner.

And then I also came up with the "name" of this... theme...
Here is a rough sketch:

I have been using "Colby's Science" for about twelve years now. It has been accompanied by a little "space frog" character that I took from Freehand 7 software (royalty free). But I want something that is not copy-written so I need to come up with my own, NEW, logo.
My theme will be "Colby's World of Science", but that is too long, so it can be "Colby's World" or "Colby's Science" for short. The idea is that I am taking students into my own little world of Physics instruction. This world exists "on the blackboard" or, on a "digital blackboard" to be precise. I can make my webpage theme chalk/chalkboard. I can make the interactive Flash files like a framed blackboard with "chalk" characters running around. I can make my video's chalk-board-like as well. The chalk "look" will fit with all three mediums... I think.
Also: I upgraded my Adobe Creative Cloud to a Teacher's Account for $19.95/month (plus tax)
Time: 4 hours
Cost: $256
Friday, March 29, 2013
more programming tutorial - Made a simple game
Besides the introduction to Adobe Illustrator that I did earlier today, for the past few days I have been working my way through the Game Design book and am now at the end of Chapter 7, page 455.
Since making the Number Guessing Game a couple days ago I have learned more about: Chapter 5 - controlling the character/screen, Chapter 6 - how to handle the character "bumping in to things", and Chapter 7 - making a graphic game with all of the components.
In this Bomb Diffusing Game the player has ten seconds to maneuver around a room full of boxes trying to clear five bombs:

The author, Rex van der Spuy, has been doing a good job of introducing new concepts, then giving us practice using them. Later he will then reference previous concepts, leaving JUST ENOUGH OUT to let the reader fill in the gaps with prior knowledge (sometimes I was flipping back a couple chapters to look-up methods that I was shown earlier.) In other words: he does a good job of keeping the reader involved and LEARNING.
There are less than 200 pages left in this book and I am feeling capable of trying to put together my own, simple interactive Physics tutorials.
Time: 5 hours
Adobe Illustrator - Getting Started
Chapter 7 of the Game Design Book is entitled "Making Games" and it has you put together a complete game.
The first half of the chapter is dedicated to creating a set of game graphics using Adobe Illustrator. (It does this in a similar way that it did in Chapter Two with Adobe Photoshop.)
Adobe Illustrator is a VECTOR BASED graphics program whereas Photoshop is a pixel-based program. Basically, it is easier to GO BACK AND MAKE CHANGES in an Illustrator file because "effects" are not layered one-on-top-of-another as they are in Photoshop. (When you go "back" in the "history" list of a Photoshop file it UNDOES EVERYTHING that you did ahead of that time. In Illustrator you can go "back" and, for example, change the color of my character's eyes instantly without effecting anything else about he character... You can go back and change the shading/color of the bomb without having to delete the red/yellow sparkler effect that I made AFTER I shaded the bomb the last time.)
I am even less familiar with Illustrator than I was with Photoshop. I like what I saw and am looking forward to using this program to create much of my imagery for my Flash applications.
Here is what I produced in about four hours of learning/practice with Illustrator:


Time: 4 hours
The first half of the chapter is dedicated to creating a set of game graphics using Adobe Illustrator. (It does this in a similar way that it did in Chapter Two with Adobe Photoshop.)
Adobe Illustrator is a VECTOR BASED graphics program whereas Photoshop is a pixel-based program. Basically, it is easier to GO BACK AND MAKE CHANGES in an Illustrator file because "effects" are not layered one-on-top-of-another as they are in Photoshop. (When you go "back" in the "history" list of a Photoshop file it UNDOES EVERYTHING that you did ahead of that time. In Illustrator you can go "back" and, for example, change the color of my character's eyes instantly without effecting anything else about he character... You can go back and change the shading/color of the bomb without having to delete the red/yellow sparkler effect that I made AFTER I shaded the bomb the last time.)
I am even less familiar with Illustrator than I was with Photoshop. I like what I saw and am looking forward to using this program to create much of my imagery for my Flash applications.
Here is what I produced in about four hours of learning/practice with Illustrator:

Time: 4 hours
Thursday, March 28, 2013
Article - Supporting Classroom Gadget Use
There was an article in today's newspaper that I tracked down off the internet and wanted to share. It is from New Jersey and describes how more educators are allowing students to use electronic devices, such as cell phones, laptops, and even Nintendo DSIs, in the classroom. Not only that, but they are ENCOURAGING their use.
Here are some relevant quotes:
Exactly what I was thinking with providing videos and interactive programs... Students in my class will have more "one-on-one" interaction with the material. Books, worksheets, and pre-made science videos just won't do the job.
Here are some relevant quotes:
"As such, more teachers are incorporating Internet-based programs, applications and videos into their lesson plans, the 21st-century equivalent of the chalk and blackboard."This is something like I am trying to implement as I feel that there will be some overlap between at-home use of the digital files that I am creating, and IN SCHOOL use. I will most-likely show SOME of my videos in my own classroom, as well as having students go to the computer lab to access the videos while they wear headphones. I will want to do something similar with the "interactive" programs that I wish to create in Adobe Flash format.
“They are turning to this as a potential model for giving students and teachers what’s called a one-to-one opportunity for digital learning, where every teacher and student has a device,”
Exactly what I was thinking with providing videos and interactive programs... Students in my class will have more "one-on-one" interaction with the material. Books, worksheets, and pre-made science videos just won't do the job.
Wednesday, March 27, 2013
More programming tutorials & a new Bamboo
First:
Yesterday the new "Wacom Bamboo Pen/Tablet" arrived and I was very excited. After I installed it my daughter and I were very excited to try it out. It is a very slender/light, texturized writing surface attached to my laptop (USB port or WiFi.). It also has a pressure sensitive, battery-less pen. This adds some much-enjoyed depth and feel to the control as I "create" with it. For example: when simulating a "felt tip pen" the pen will stop and "soak" into the computer screen if I stop writing and it will also soak faster if I press the pen harder. The "color pencil" will have nice light/medium/dark shades, accompanied by thin/medium/thick pen strokes that match the amount of pen pressure the drawer is using at the time. Very interesting. I am looking forward to working with this tool in the months to come.
Second:
When I was not "playing around" with my new pen/tablet I was working forward in the Game Design book. I am now up to page 265. Chapter four has the user create a numbers guessing game. It introduces the reader to: text field formatting, text field input/output, string manipulation, modularizing, variable types, key press listeners, if/else-if/else decision making, tracking long-term game status, random number generation, and integers/ceiling/floor cutoffs. I ended in the middle of animated button implementation. (The buttons need to visually react when the "player" hovers the mouse over them or presses them.)
Here is a snapshot of the latest practice:

Time: 4 hours
Sunday, March 24, 2013
ActionScript 3.0 - second practice program
Today was the second day working in the book, Foundation Game Design with ActionScript 3.0. I am up to page 207.
I spent a number of hours (a) Completing Chapter Two, where I used Photoshop to draw six button images and a cat-looking character and (b) Completing Chapter Three, where I learned how to place these items together in a Flash file (as sprites) and then programmed them with some simple controls.
Here is a snapshot of the Flash file in action, with the ActionScript editor to the right:

This is basically a cook-book tutorial. Chapter Three describes action handlers, functions, variables, sprites, conditional operators (if/then statements), mouse events, object property manipulation and more.
In my little program (seen above) the cat "character" is manipulated using the buttons. The user can move it up and down, make him bigger/smaller, make him disappear/reappear, and rotate.
Remember:
(1) Every single piece of artwork was drawn by me, following the Photoshop tutorial (chapter two of the book)
(2) The purpose was NOT just to create a cat game... The purpose of the programming is to teach me a little bit about how ActionScript 3.0 works. (some day I hope to use ActionScript 3.0 and Flash to create some Physics simulations for my students to use online.)
Time = 5 hours
Saturday, March 23, 2013
Adobe Photoshop - getting started
The Foundations Game Design with ActionScript 3.0 book also includes tutorials on Photoshop.
The whole purpose of chapter two is for the user to create some image files to be used later (in Chapter Three) to program a simple game.
In the PAST I have probably used Photoshop for a grand total of maybe 25 hours. I did not use any tutorials and I basically just "poked my way around." It was NOT very effective, but it got the job done.
In contrast: chapter two of this book is a MORE EFFECTIVE MEANS of getting a good, basic working knowledge of Photoshop, especially for creating simple game graphics.
Chapter two describes various tools (pen tool, convert point tool, rectangle tool, ellipse tool, gradient tool, paint bucket tool, type tool, path/direct select tools, and rectangular marquee tool.) It also goes into: transform controls, color controls, layers, opacity/color stops, paths panel, style panel, emboss/bevel layer effect, turning vector shapes into pixels, and chaining/grouping layers. Finally, it takes the user through how to save a .png file of an image, which is important for later importing into a Flash (.swf) file. (Flash files are used to play the AcionScript 3.0 programs/games/activities that I would like to make for my Physics class.)
For example, here is the .png file that I created from scratch by following the instructions in chapter two:

Later this weekend I plan on completing chapter two, which will have me create two more image files: a character (that looks like a cat), and a set of six button images (which will later be programmed to control the motion of the cat?)
Time: 1.5 hours
Adobe Flash Builder - getting started
My two game-maker books came in the mail today and I just could NOT wait to dig right in.
After about four hours I have progressed through the first 100 pages of "Foundation Game Design with ActionScript 3.0" It is a very very good book and pretty easy to read.
Here is a quote...
"This book assumes that you haven't had any experience making graphics for games or any experience with computer programming. You'll go step-by-step journey through these fascinating worlds."
The author also mentions how this book was the source for three high school classes in game design. I believe that sums it up nicely. It is written at about a high school level and easy to follow. What makes it actually WORK is that you HAVE YOUR PROGRAM(S) OPEN while you read the book and you actually DO the activities as described. (I also high-light and take some notes while I go through the text so I can find the information easily when I need it.)
In chapter one you write some basic code (using Adobe Flash Builder program) and learn the basics of programming.
Here is an example of the little bit of code written:

The reason this takes a full chapter is because the author does a very good job of EXPLAINING just what all of the parts of the code do as well as some of the major menus/controls of the Flash Builder program itself. It is the foundation for the rest of the book. (The reason the book is so thick is because it is chock full of images to show exactly what the user is to do.)
Time: 2.5 hours
School District Server - Won't Be Good Enough
With lots of help from a colleague at work I was able to try out our school district server. Unfortunately, I do not think it will meet my needs of providing an interface/storage space for all of my online curriculum.
Let me explain (for those of you who may be trying this at your own school site)
Starting this year (2013) the district changed over to a service provider that helps provide support/server space for the District Web Page (which also means the School Web Page(s)) As part of this new service the TEACHERS will be able to make "Teacher/Class/Activity" pages.
How it works: A teacher is given a username/login and is assigned a web page. They log in and use the PROVIDED TOOLS to create a web page. (This is very similar to those teacher pages that are provided for FREE, except that it is integrated directly into the school's web page.)
Here is an example of what my web page looks like when I log in:

The top, gray menu is the "design" menu which is only visible to myself (and any other web-master at the district office who has access to my page.) This menu gives me lots of options to personalize my teacher page. (You can add a calendar, teacher blog, information pages, insert photos, add more pages to link to, etc...) This provides a fairly easy method for just about any teacher to create a useful web page to be accessed by the students.
There are some aspects of this that need to be pointed out, however:
(1) The whole top of the page (above the gray horizontal line) is set in place and can not be changed by me. It is the school's header and the school page's menu bar.
(2) Because of (1) my page will essentially be running INSIDE of the school district's page. Therefore my page will have to follow the same text formats, etc. It will have the same background color (white, in this case) and the same "look" to it.
(3) There is NO ftp-server access provided. "ftp" stands for "file transfer protocol" and most web servers give the customer a means of logging in and UPLOADING FILES to their web site. (For example: movie clips, photos, flash files, pdf files, and their actual html web pages themselves). Because of the way our access is set up, we (the teachers) are only allowed to use the above-said menu options to manipulate our pages, WHICH GREATLY LIMITS WHAT WE CAN DO.
My plan is to use programs like Adobe Muse (supported with Adobe Flash, videos, etc) to create an all-encompassing Physics-classroom EXPERIENCE for my students. The limited server access provided by my school district, while suitable for just about any, everyday teacher needs, will simply NOT work for what I have in mind.
I will set up a basic web page (as shown) to serve as a doorway to my content site. The school page will have my office hours and basic information, while the content site (which I will likely have to pay for myself) will have all of my online lessons and practice activities.
Let me explain (for those of you who may be trying this at your own school site)
Starting this year (2013) the district changed over to a service provider that helps provide support/server space for the District Web Page (which also means the School Web Page(s)) As part of this new service the TEACHERS will be able to make "Teacher/Class/Activity" pages.
How it works: A teacher is given a username/login and is assigned a web page. They log in and use the PROVIDED TOOLS to create a web page. (This is very similar to those teacher pages that are provided for FREE, except that it is integrated directly into the school's web page.)
Here is an example of what my web page looks like when I log in:

There are some aspects of this that need to be pointed out, however:
(1) The whole top of the page (above the gray horizontal line) is set in place and can not be changed by me. It is the school's header and the school page's menu bar.
(2) Because of (1) my page will essentially be running INSIDE of the school district's page. Therefore my page will have to follow the same text formats, etc. It will have the same background color (white, in this case) and the same "look" to it.
(3) There is NO ftp-server access provided. "ftp" stands for "file transfer protocol" and most web servers give the customer a means of logging in and UPLOADING FILES to their web site. (For example: movie clips, photos, flash files, pdf files, and their actual html web pages themselves). Because of the way our access is set up, we (the teachers) are only allowed to use the above-said menu options to manipulate our pages, WHICH GREATLY LIMITS WHAT WE CAN DO.
My plan is to use programs like Adobe Muse (supported with Adobe Flash, videos, etc) to create an all-encompassing Physics-classroom EXPERIENCE for my students. The limited server access provided by my school district, while suitable for just about any, everyday teacher needs, will simply NOT work for what I have in mind.
I will set up a basic web page (as shown) to serve as a doorway to my content site. The school page will have my office hours and basic information, while the content site (which I will likely have to pay for myself) will have all of my online lessons and practice activities.
Wednesday, March 20, 2013
Starting The Web Page - School District Server
With the help of a colleague at work I was able to set up a basic web page on our school district server. (it is not live yet).
However, the page, so far, only allows me to do basic "tweaks" and set up simple frames, text boxes, etc. It is not suitable for the monumental task that I have before me. (I will need ftp access so I can just upload my web content directly from my hard drive. On my finished product I am planning on having many sub-pages, videos, pdf files, and who knows how many flash files....)
Hopefully the district server will work for me. (I would hate to have to find web hosting somewhere else)
On another note: I have upgraded my HOME internet access to 12mps up from 3mps that I have had for ten years now. This should help with file transfers.
Time: 1.5 hours
Tuesday, March 19, 2013
Purchased Programming Books (for games)
I was so impressed with Adobe Flash Pro CS6 and I am so excited about the possibilities that it represents that I purchased two programming books to help me get started as soon as possible and with the minimum amount of frustration.

(1) Foundation Game Design With Action Script 3.0
This book is made for absolute BEGINNERS. It takes you through the basics of Object Oriented Programming. I think it will be a good refresher for me. Also, there is a slight possibility that Little Colby (my daughter) might find some of this interesting (she loves LOVES making games)
(2) Adobe Flash Professional CS6 Classroom in a Book
This book, in contrast, focuses exclusively on the Adobe software itself. When going through some of the ONLINE tutorials I found them easy to follow.... However, the Adobe Flash Pro application is very deep and rich in content. It is easy to get lost (ie: to forget) where things are in the menus, etc. I need something I can hold on to and mark up (highlite) and put sticky notes in so that I can easily re-find what I need. (I am a book person... I like books.... Trying to flip back-n-forth betwen browser tutorials and the actual application gets to be a pain sometimes.)
Cost: $60
Time: 1 hour
Monday, March 18, 2013
Adobe Flash Professional CS6 - getting started
I just
couldn’t wait for Spring break in order to try out this application. (So, I downloaded and installed it tonight!)
 Adobe Flash Professional CS6 is used to create Adobe swf files (aka: flash
files) that allows one to create animations, interactive menus, and, yes, even
games. I should be able to "publish" my swf files along with my web page so they can be run in a student's browser.
Adobe Flash Professional CS6 is used to create Adobe swf files (aka: flash
files) that allows one to create animations, interactive menus, and, yes, even
games. I should be able to "publish" my swf files along with my web page so they can be run in a student's browser.
Here is a quote from the beginning of the tutorial:
My hope is that I will be able to create some very simple, interactive demonstrations for my physics students to manipulate. For example: Two different vehicles on a road with two buildings in the background. The students click/drag the speed of the second car and hit “play” and watch the cars race together. The time for the cars to reach each building are displayed and the students can answer various questions about time –vs- speed/distance. (that was just a rough idea)
Adobe Flash Professional CS6 is used to create Adobe swf files (aka: flash
files) that allows one to create animations, interactive menus, and, yes, even
games. I should be able to "publish" my swf files along with my web page so they can be run in a student's browser.
I completed the first tutorial in about two hours.
It has you create a file where you make a simple animation (with click-and-drag
way-points to program the motion) and a “replay” button.
Here is a quote from the beginning of the tutorial:
Prior experience working with Flash Professional CS5 is not required. This introductory article provides all the steps you need to get started. Although this sample project includes some ActionScript code, previous knowledge of programming is not necessary.ActionScript code is a programming language that is used inside a flash file. As the above quote suggests, it is not necessary to understand programming to make some basic flash files. (Just to get an idea, for those of you who might be interesting in doing some scripting, here is a video tutorial about ActionScript.)
My hope is that I will be able to create some very simple, interactive demonstrations for my physics students to manipulate. For example: Two different vehicles on a road with two buildings in the background. The students click/drag the speed of the second car and hit “play” and watch the cars race together. The time for the cars to reach each building are displayed and the students can answer various questions about time –vs- speed/distance. (that was just a rough idea)
The list price of this application is $200 for
educators/students and retails at $700 for non-educators. Unlimited use is
included with my subscription to Adobe Creative Cloud.
Conclusion: I was very pleased with what I saw today. I
think this will work for my project! I am sure you will be seeing more about this application later in my blog.
Time: 3.5 hrs
Saturday, March 16, 2013
Adobe Muse - getting started
So the first piece of Adobe software I have decided to try out is Adobe Muse.

I chose this program to start with because: (a) I won’t have a lot of time (until Spring Break) to delve into any of the more complicated Adobe applications and this application seems relatively simple. (b) I have no experience with web-authoring software and I am eager to see what it can do. (In the past I have used either my own, limited HTML scripting, or I used some hosting sites “page tools” to make some sort of limited “home page”)
Today I spent a few hours just trying things out, making a temporary (and silly) web page. I found it to be very user friendly (it is designed for people who do NOT know HTML) and it should be a good option for me to set up my classroom web page with.
I could go into all of the options but I think this 30 minute tutorial video from Adobe does it far better than I could.
Time: 3 hours
What Software Will I Be Using?
My Adobe software is a decade old and it will not run on Windows 7.
The Solution: Adobe Creative Cloud - Today I signed up for the “1 month trial version” of Adobe Creative Cloud. I will be using this until April when I am planning on purchasing the educator/student version.
Will it be worth it? Yes.
For the monthly subscription fee you get access to every single Adobe program for creating videos, illustrations, working with photos, sound files, print and pdf documents, animations, creating web sites, and even flash files.
I am excited!
You can bet that I will be blogging about each program as I try them out. In the past I have used a handful of their products so I have some experience with Adobe. Having access to several-thousand- dollars-worth of professional quality software is simply mind boggling to this public school teacher!
In this image you can see that I have downloaded and started my trial with Adobe Muse, a new program made for designers to quickly create web pages. (more on that later)
 |
| Adobe Application Manager |
Notes about the cost of Adobe Creative Cloud:
(1) I am starting with the one month free trial for now. In order to do this I had to LOG OFF at the screen where they asked you which version you wanted (they gave two paying options). About 12 hours later I received an email from Adobe welcoming me to the “trial version.”
(2) In a few weeks I will be upgrading to the “Student and Teacher Edition” that will be offered for $19.95 until April 7th. (They say the normal price is $30/month for this verison)
(3)If you are not an educator/student your monthly subscription fee will be higher (Currently it is listed as $49.99 per month.)
Time: 2 hours
New Pen/Tablet
I will be spending many hours using artistic/creative based programs for working on the web page and creating videos. This will require the creation of images/diagrams as well. I will also be capturing video of my lectures while I am writing on the computer. I already have a Mobi and software but I will need something to work with at home on my laptop.
After about an hour of searching online and looking at reviews I have ordered the Wacom Bamboo Capture Pen and Touch Tablet for about $80 (free shipping). I have decided to go with the “Capture” instead of the larger “Create” because (a) The Create is almost twice the price of the “Capture” and (b) I am partial to the smaller size of the Capture… I am not that great of an artist to need the details of the larger pad AND I think the smaller tablet will be more easy to place on my desk. I chose the “Capture” instead of the lower-priced “Splash” because I am interested in the dual-point touch features of the Capture that let you “zoom/scroll/rotate/swipe.”
UPDATE: After working with the "Capture" for several months I would now recommend the less expensive "Splash." It will save you about 20 bucks. I have found that I never actually USE the "zoom/scroll/rotate/swipe" capabilities of the Capture (it is easier to use the built-in mouse pad on my laptop to do the same thing.)
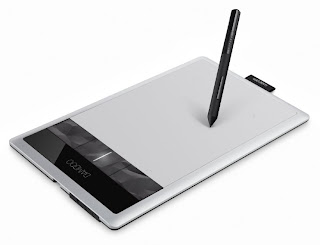
Expenses: $80
Friday, March 15, 2013
Vimeo - Video Storage
I have spent some time setting up a Vimeo account from which to store my larger videos. (If you remember, I will be limited on my district server to only 50 mb per upload... small videos)
I have chosen Vimeo partially because it has more access options (such as password access to view videos, if I choose.) It also seems less "gimicky" than YouTube.
I am currently using the "free" version.
I may upgrade some day to a subscription version, if there is a reason for it.
UPDATE (April 26th): I have decided NOT to use Vimeo. I was able to save/play videos directly from my www.colbysworld.net website instead.
Time: 2.5 hours
Planning: Part I - Student Access
Next year our district office will allow teachers to publish
web pages on their server. So part of my plan is to make a web page for my
students and have it hosted by the district office. (In other words: I won’t be
using any of the various outside resources available for teachers to create
relatively simple classroom pages. This should allow me to have greater
creative control.)
Problem: Our student’s accounts have content control
blocking software which limits access to various online resources. Of
particular note: students may not access video servers (YouTube, Vimeo, etc) or
Blog sites while on campus.Partial Solution: I can upload my videos onto our district server for students to access. However, there is currently an upload limit of 50mb per file. This will limit video sizes to only around 3 to 5 minutes! Not a very long lecture, is it? My plan: I expect to use a video server for longer files (Vimeo?) that students can access at home… and I will use the district server for the shorter files, that students may access at school and during class time*.
*I have this idea of implementing differentiated instruction... I will take my class to the computer lab periodically... Those students that have NOT completed homework will catch up during lab time, while the students who ARE on track will move forward with other, possibly more fun activities.
What Do I Have So Far?
Before I get started I think I should share a little about my background. In other words: what do I have right now to work with?
(1) I am certified in Explicit Direct Instruction strategies.
(2) I have a BS degree in Engineering Physics with an emphasis on digital electronics. (I was a bit of a computer geek in college)
(3) In the 1990’s I learned a bit of HTML (you basically HAD to if you wanted to post anything on the Internet back then!)
(4) About 10 years ago I purchased a suite of Adobe programs with an educator’s discount (I think it cost about $350): Adobe Premiere, After Effects, Illustrator, Photoshop, and a full version of Acrobat. I used these to make various items for my classroom: worksheets, interactive pdf files, videos, and a few DVDs.
(5) I have some basic computer programming skills (classes in high school, college, and as a hobby) I have used Visual Basic to create some tools to use in my classroom.
(6) For six years now my class grading policy has been strongly influenced by the teachings of Dr. Doug Reeves. I believe in giving students MULTIPLE CHANCES for success in proving that they have learned the content required. Students are given each quiz two times in class, and then they can also make them up outside of class time (until the last week of the semester) Students can re-write lab conclusions until they succeed. I also give my final exam twice to give students multiple chances of passing each section. (I have multiple versions of each quiz and two full versions of the final.)
(7) Collaboration – I am at a school site (and in a school district) that promotes collaboration amongst its teachers. (I feel sorry for those of you who must teach in isolation, with no help from colleagues)
(8) Hardware - At home I have a fairly powerful Windows 7 gaming laptop (great graphics card, HDMI outputs, but the 1TB hard drive is a bit slow for video editing purposes.) I have a Sony HDR-CX190 Handycam for video filming. My classroom has a dedicated (mounted) LCD projector and (7-year-old) Windows computer. The classroom also has a Mobi Pad, which is a wireless remote control/writing pad for the computer. The pad uses Intewrite Workspace Software which allows me to write, highlight, cut/paste, open web pages, advance powerpoint slides, shade, type, as well as record video right off of the computer screen.
Well, that’s what I have to work with so far.
Thursday, March 14, 2013
Video Inspiration
One reason I am so excited/motivated to do the "flipped classroom" is because of...
...my 11-year-old daughter.
Back in early December I caught her watching this hexaflexagon video. Not only did she WATCH it... but she RE-watched it.... over and over again. I could hear the voice of the young lady from the video (Vihart) coming from the computer... Over and over again... interrupted by occasional 1-or-2-minute pauses...
I got curious and went over to look over my daughter's shoulder... She had scraps of paper and was folding them... gluing them.... and, later, coloring and writing on them. My daughter would pause the video at certain points in the instruction to make sure that she had gotten her work just right. Soon she had a couple hexaflexagons of her own. She was enthralled.
In the following weeks the whole "hexaflexagon" phenomenon had taken her over. My daughter was sharing hexaflexagons with everyone. Over the next three months she has probably seen that video over 50 times! And yet this was not the most amazing part...
What was really amazing was that MY DAUGHTER WAS LEARNING MATH through these videos.
And she LOVED it!
The young lady who made the inspiring hexaflexagon video is Vihart, a self-proclaimed, "professional mathemusician." Since then my daughter has watched many other of Vihart's videos and she would learn about spirals in nature, Fibonacci series, prime numbers, pi, tau,and even vector fields!
I find that Vihart has a unique way of presenting her material. It is fast-paced and their are usually two message streams running simultaneously (visual and aural). On her video list she has this "How to make a video about making a video" video that I highly recommend.
What is "The Flipped Classroom?"
I have been a science teacher for over fifteen years. Every year I feel that my teaching has improved but now I am ready for a new challenge.
For the past few years I have been hearing about something called “The Flipped Classroom” and have let the idea sit at the back of the brain for a while. About a month ago I decided to look into it more. I eventually landed on Dan Spencer’s page.
As Dan mentions, the term “Flipped Classroom” is “just a catchy phrase” that can mean a lot of different things. It can be done poorly, or well, just like many teaching methodologies.
In a "traditional" classroom the students come to school to watch the teacher lecture as they take notes, then they go home to practice what they have learned, as written homework. In contrast, a “flipped” classroom is one in which the students get much of the lecturing/note-taking at home so they can spend even more of their classroom time doing work and activitees under the guidance of the teacher.
I want to do this for my physics classes...
and... I want to do it well.
I anticipate spending many many hours, especially this first year, to implement this practice. There will be technological difficulties as well as classroom management and teaching challenges. How do I allow ALL students to be successful under this sort of situation? What do I do with those students who refuse to do ANYTHING outside of class time? How do I continue to challenge that other type of student who decides to complete everything so they have "nothing" to do? How will this affect my standardized test scores? What about student failure rates?
After spending a few weeks looking into the possibilities (I will write about those later) I have decided to create this Blog for two main reasons: (1) I want to have a place for myself, to keep track of the hours spent on each of the various aspects of this “project”, also (2) It might be useful to other teachers who may wish to consider implementing some of these ideas into their own curriculum.
This is the very first page of what might well be a year-long blog...
Subscribe to:
Posts (Atom)